Are you tired of using the same old 2D maps for your presentations and projects? Hillshade Lapakgis time to take it up a notch with stunning 3D terrain maps! And the good news is, creating these beauties has always been challenging, thanks to Hillshade Lapakgis. In this blog post, we’ll show you how to create breathtaking 3D terrain maps that leave your audience in awe. So buckle up and get ready to elevate your map game!
What is Hillshade Lapakgis?
Hillshade Lapakgis is a great tool for creating stunning d terrain maps. It allows you to create hills, valleys, and other features easily. You can also use it to add texture and color to your maps.
To use Hillshade Lapakgis, first set up your map canvas. You can do this in any form you like. I typically draw my map on paper and then scan it into Photoshop. Next, open the Hillshade Lapakgis plugin and add hills and valleys to your map. You can adjust their size, shape, and color using the controls in the plugin.
Once you have finished adding hills and valleys, it’s time to add texture. This can be accomplished in a few other ways. One way is to add random textures using the Random texture control. Another way is to use the Blend texture control to merge multiple textures.
Once you have added texture, it’s time to finish up your map by adding colors. This is done using Color control. You can use this control to change the color of all the elements on your map or select specific elements to colorize.
How to Create a Hillshade Lapakgis Map
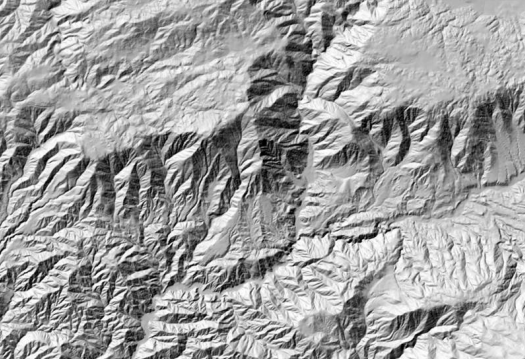
If you’re looking for an effective way to add detail and realism to your maps, hillshade lapakgis is the perfect solution. This technique creates a three-dimensional shading effect that can be used to create stunning terrain maps.
To create a hillshade lapakgis map, you’ll need the following supplies:
Hillshade lapakgis software (either Adobe Photoshop or GIMP)
A graphics tablet or mouse with Wacom pen support
An image of a terrain you want to map
Step 1: Start by importing your image into your lapakgis software. You can use the provided presets or create custom settings using your software’s controls. You’ll also need to define the size and resolution of your map.
Step 2: Once your image is in place, layering in the hills using the various tools available on your software. Use the Pen tool to make detailed lines and shapes and adjust their opacity to achieve the desired effect. Use as many layers as needed to get a realistic result.
Step 3: To finish off the map, add some streams and other features using similar techniques. Use layers, curves, and masks to position these elements according to your needs precisely. Once everything is in place, you’re ready to export your map!
Tips for Creating Beautiful 3D Terrain Maps
If you want to add extra visual interest to your maps, creating 3D terrain is a great way to go. Here are some tips for creating beautiful 3D terrain maps:
1. Start with a 2D sketch or map. This will help you define your terrain’s basic shapes and dimensions.
2. Use a hillshade tool in Photoshop or GIMP to create the shading on your map. This will give it the look of a real landscape.
3. Add textures and features using Photoshop or GIMP brushes and textures. This will give your map added realism and detail.
4. Export your map as a 3D file using software like Blender or Maya, and you’re ready to start modeling!
Tips for Making a Stunning 3D Terrain Map with Hillshade Lapakgis
1. Import your data into the software to create stunning 3D terrain maps with hillshade lapakgis. You can use any file type that hillshade lapakgis can read, including elevation data, vector files, and Shapefiles.
2. Next, use the tools in the map editor to create hills and valleys. Use the sliders to control how steep the hills are and adjust their size and shape.
3. Once your hills are set up, add trees and other landscape features using the same tools. You can modify the colors of objects using the color picker or change their opacity to create a more realistic effect.
4. To finish your map, add a final layer of haze using the haze tool to give it a vintage look. Hillshade lapakgis is an amazing tool for creating stunning 3D terrain maps that are perfect for gaming or VR applications
Conclusion
This article discusses how to create stunning 3D terrain maps using Hillshade Lapakgis. Following the instructions, you can create realistic battlefields and other perfect settings for your next game or project. Whether you are a graphics designer or want to improve your visualization skills, learning to use Hillshade Lapakgis is a valuable investment.